
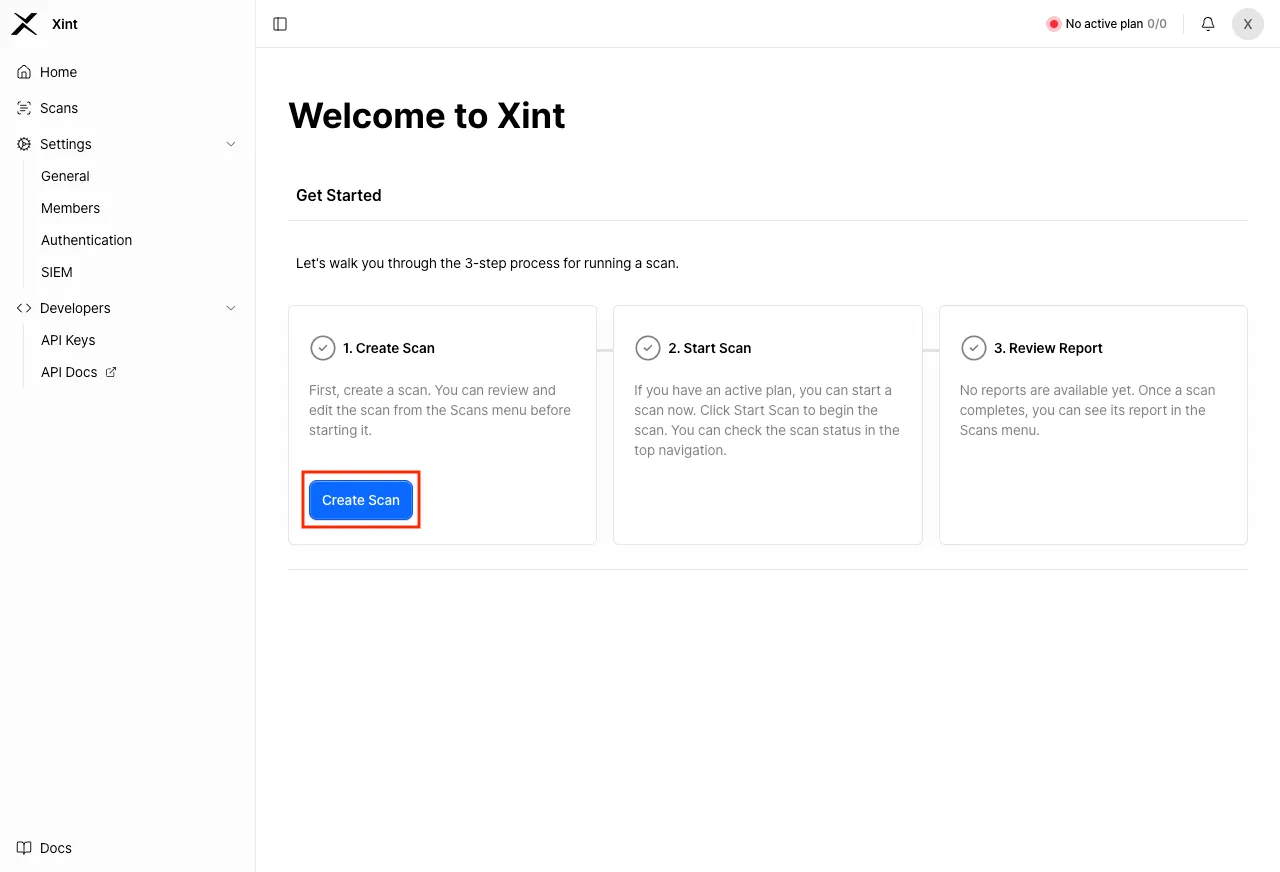
Creating a Scan
You can navigate to the scan creation page by clicking the ‘Create Scan’ button on the Home screen or the Scans page.
The scan creation process is divided into 5 main stages:
- Set target URL stage
- Configure scan scope stage
- Authentication information input stage
- Configure scan control stage
- Review configuration stage
1. Set Target URL
Section titled “1. Set Target URL”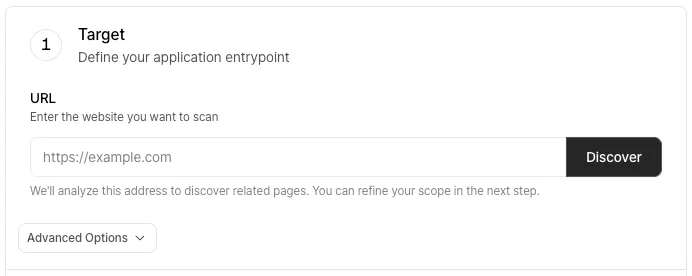
Enter the URL that will be the starting point of the scan and click the “Discover” button. When you click the button, Xint will verify whether the entered URL is accessible. Once the discovery is complete, you can configure recommended domains to add to the scan scope.
Advanced Settings
Section titled “Advanced Settings”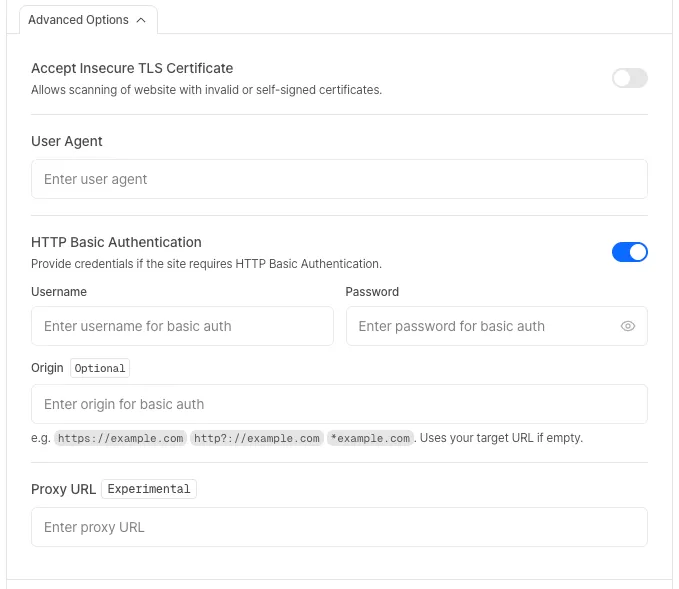
Accept Insecure TLS Certificate
Section titled “Accept Insecure TLS Certificate”Xint’s scan engine validates HTTPS certificates when connecting to a website. If there is an issue with the target website’s TLS certificate, the connection will be blocked for security reasons, causing the scan to fail.
Enabling this option bypasses certificate validation, allowing the scan to proceed despite security warnings.
When to enable this option
- Self-signed certificates: The certificate was not issued by a trusted Certificate Authority (CA).
- Expired certificates: The certificate has exceeded its validity period.
- Certificate hostname mismatch: The certificate’s domain does not match the target URL.
User Agent
Section titled “User Agent”You can set the User Agent header that Xint uses when sending HTTP requests during a scan.
This can be useful for testing with a mobile browser’s User Agent or inserting a specific string for server log identification.
HTTP Basic Authentication
Section titled “HTTP Basic Authentication”If HTTP Basic Authentication is required to access the site, enable this option.
- Origin: If multiple URLs require Basic Authentication, set this value to cover all URLs that need authentication.
Proxy Configuration
Section titled “Proxy Configuration”You can specify a Proxy URL to route all scan traffic through the configured proxy.
This option is useful when you need to perform scans against targets that are only accessible within internal networks or restricted environments.
Configure Scan Scope
Section titled “Configure Scan Scope”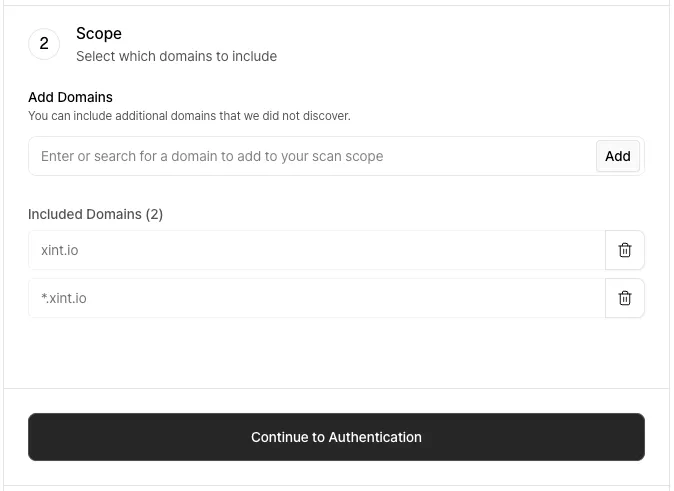
After target URL verification is complete, you need to specify the scope of the scan that Xint will perform through scan scope settings. Since Xint only scans URLs within the scan scope, please configure the scan scope appropriately for your situation.
A recommended scan scope list based on the target URL is provided, and default values are automatically added.
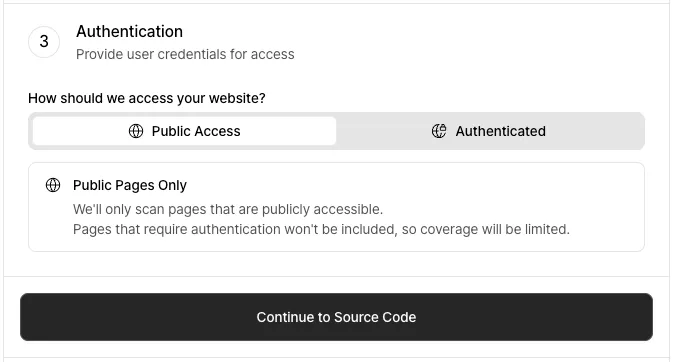
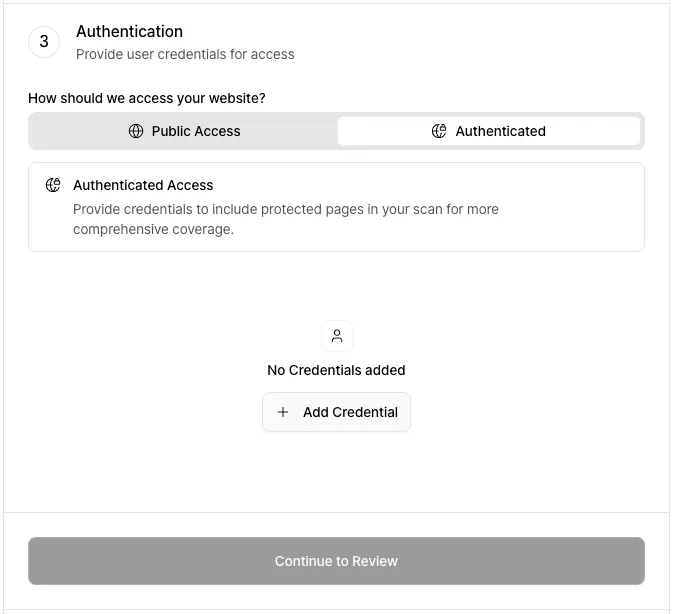
Scan Authentication Information
Section titled “Scan Authentication Information”If the site does not require separate authentication for scanning, leave it as Public Access and proceed to the next step.
-
Click the “Add Credential” button to add a user.
-
Enter the authentication information.
You can assign a name to easily identify the user. Depending on the authentication method required by the site, enter the appropriate ID and password / cookie / local storage information.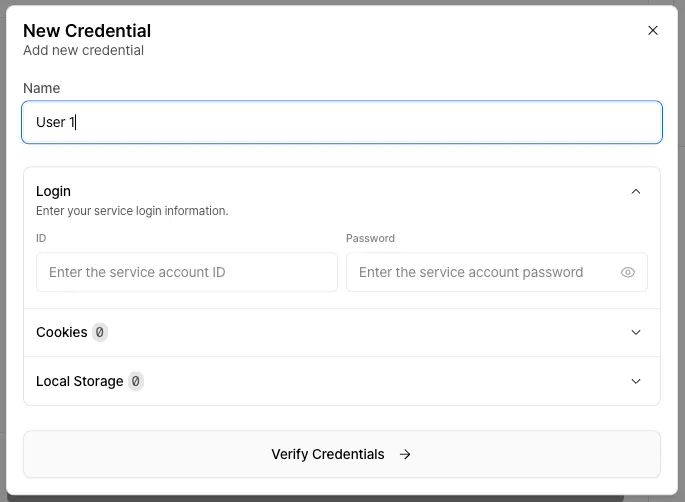
-
The AI will attempt to log in using the entered credentials to verify that they are valid. This process may take a few minutes.
-
Verify through the screenshot that the login was completed successfully.
If the login was successful, click the “Confirm & Use this credential” button. Otherwise, click the “Cancel” button and review the credentials.
If the login fails despite entering the correct information, please contact us through the in-app support form or at contact@xint.io.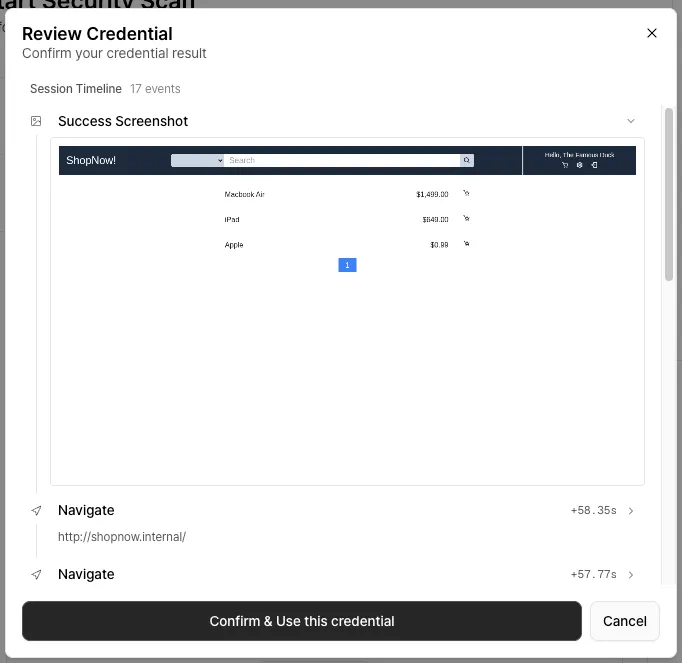
-
Once the confirmation of all registered credentials is complete, you can proceed to the next step.
Scan Control
Section titled “Scan Control”Allowed Scanning Time
Section titled “Allowed Scanning Time”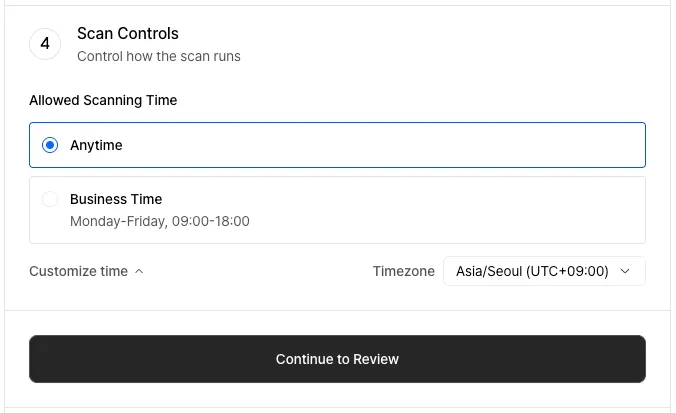
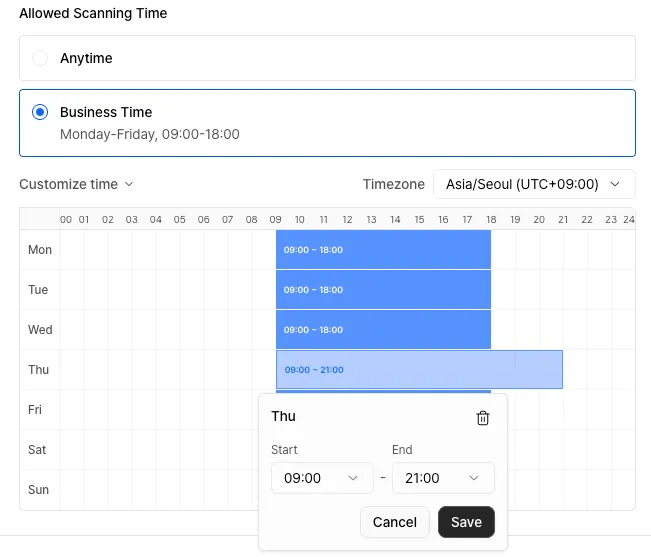
If you want to allow scanning only on specific days and during specific time slots, you can control the scan through this setting.
Outside the configured allowed time, the scan will automatically pause, and it will automatically resume when the allowed time arrives.
Click “Customize time” below to set your preferred time. You can configure the schedule in 30-minute increments using drag-and-drop or clicking.
Review and Start Scan
Section titled “Review and Start Scan”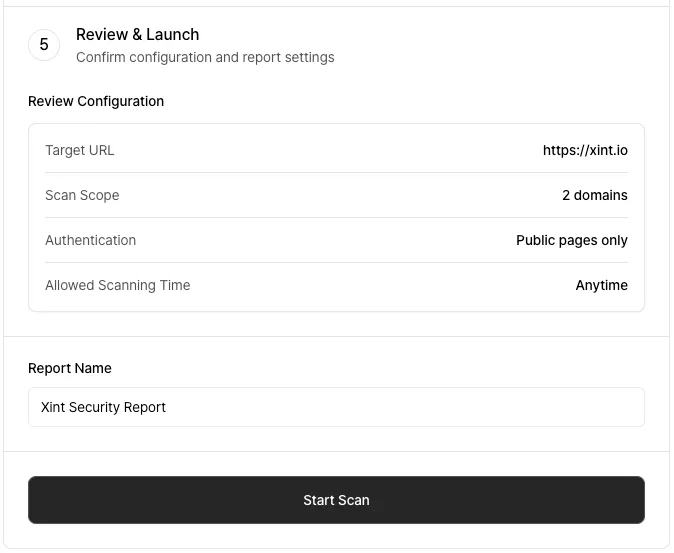
You can review the information provided for the scan and configure report settings.
- Assign a name to your scan so it can be easily identified. By default, the scan’s target URL is used as the name.
Finally, review the entered information and click the “Start Scan” button at the bottom to initiate the new scan.