
Release Note #5 (2026.05)
New Features
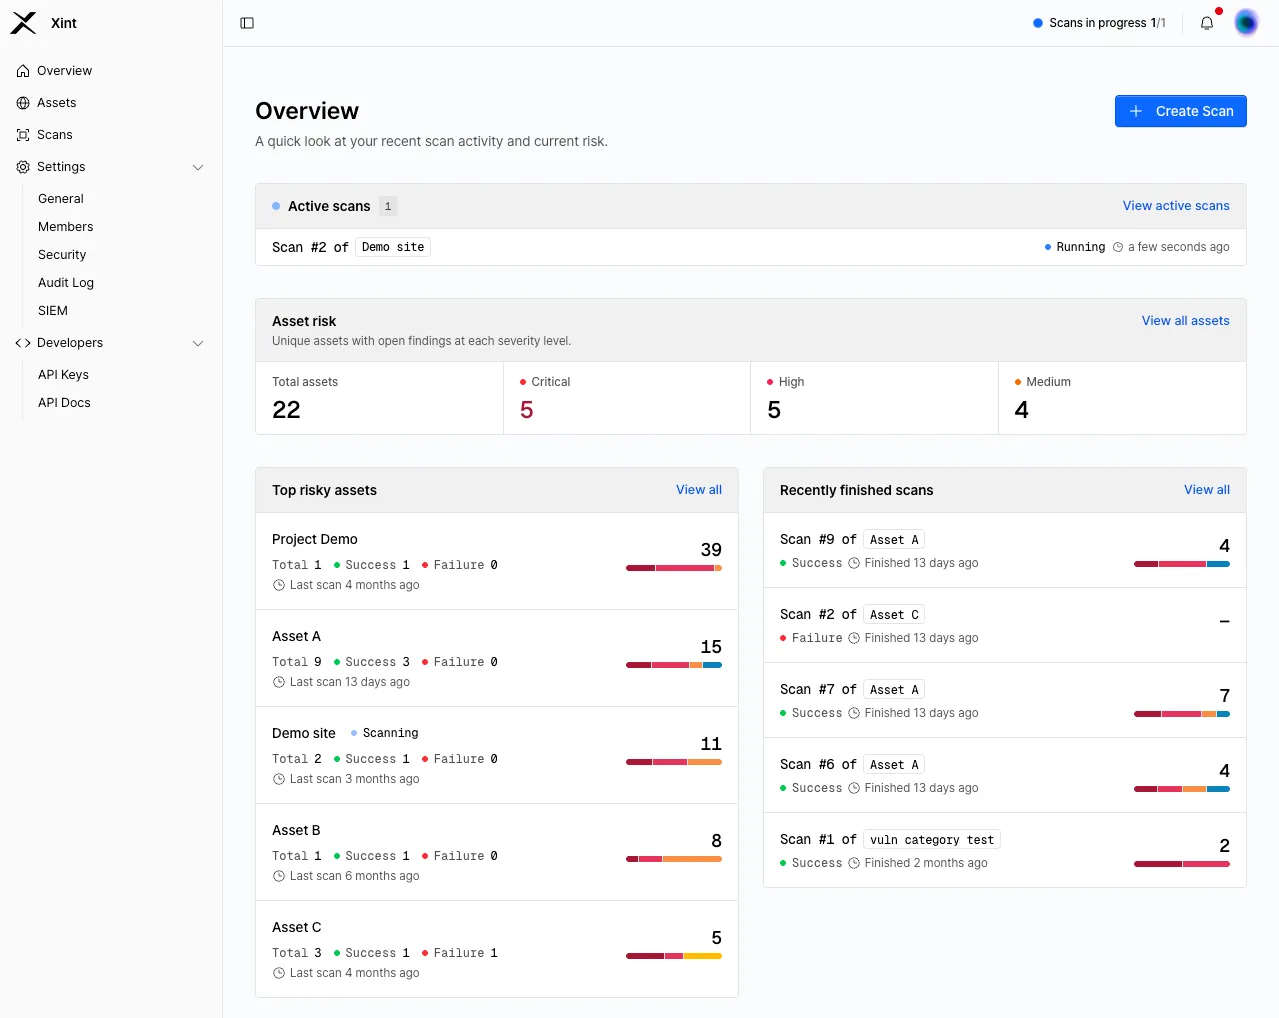
Section titled “New Features”Introducing Assets
Section titled “Introducing Assets”This update introduces a new concept called Assets. When you regularly scan the same website, you can save your common configuration settings as an Asset — so you don’t have to re-enter the same values every time you kick off a new scan. Assets also give you a single place to track the full scan history for each target.
To learn more about assets and scans, check out the What is an Asset? and What is a Scan? docs.
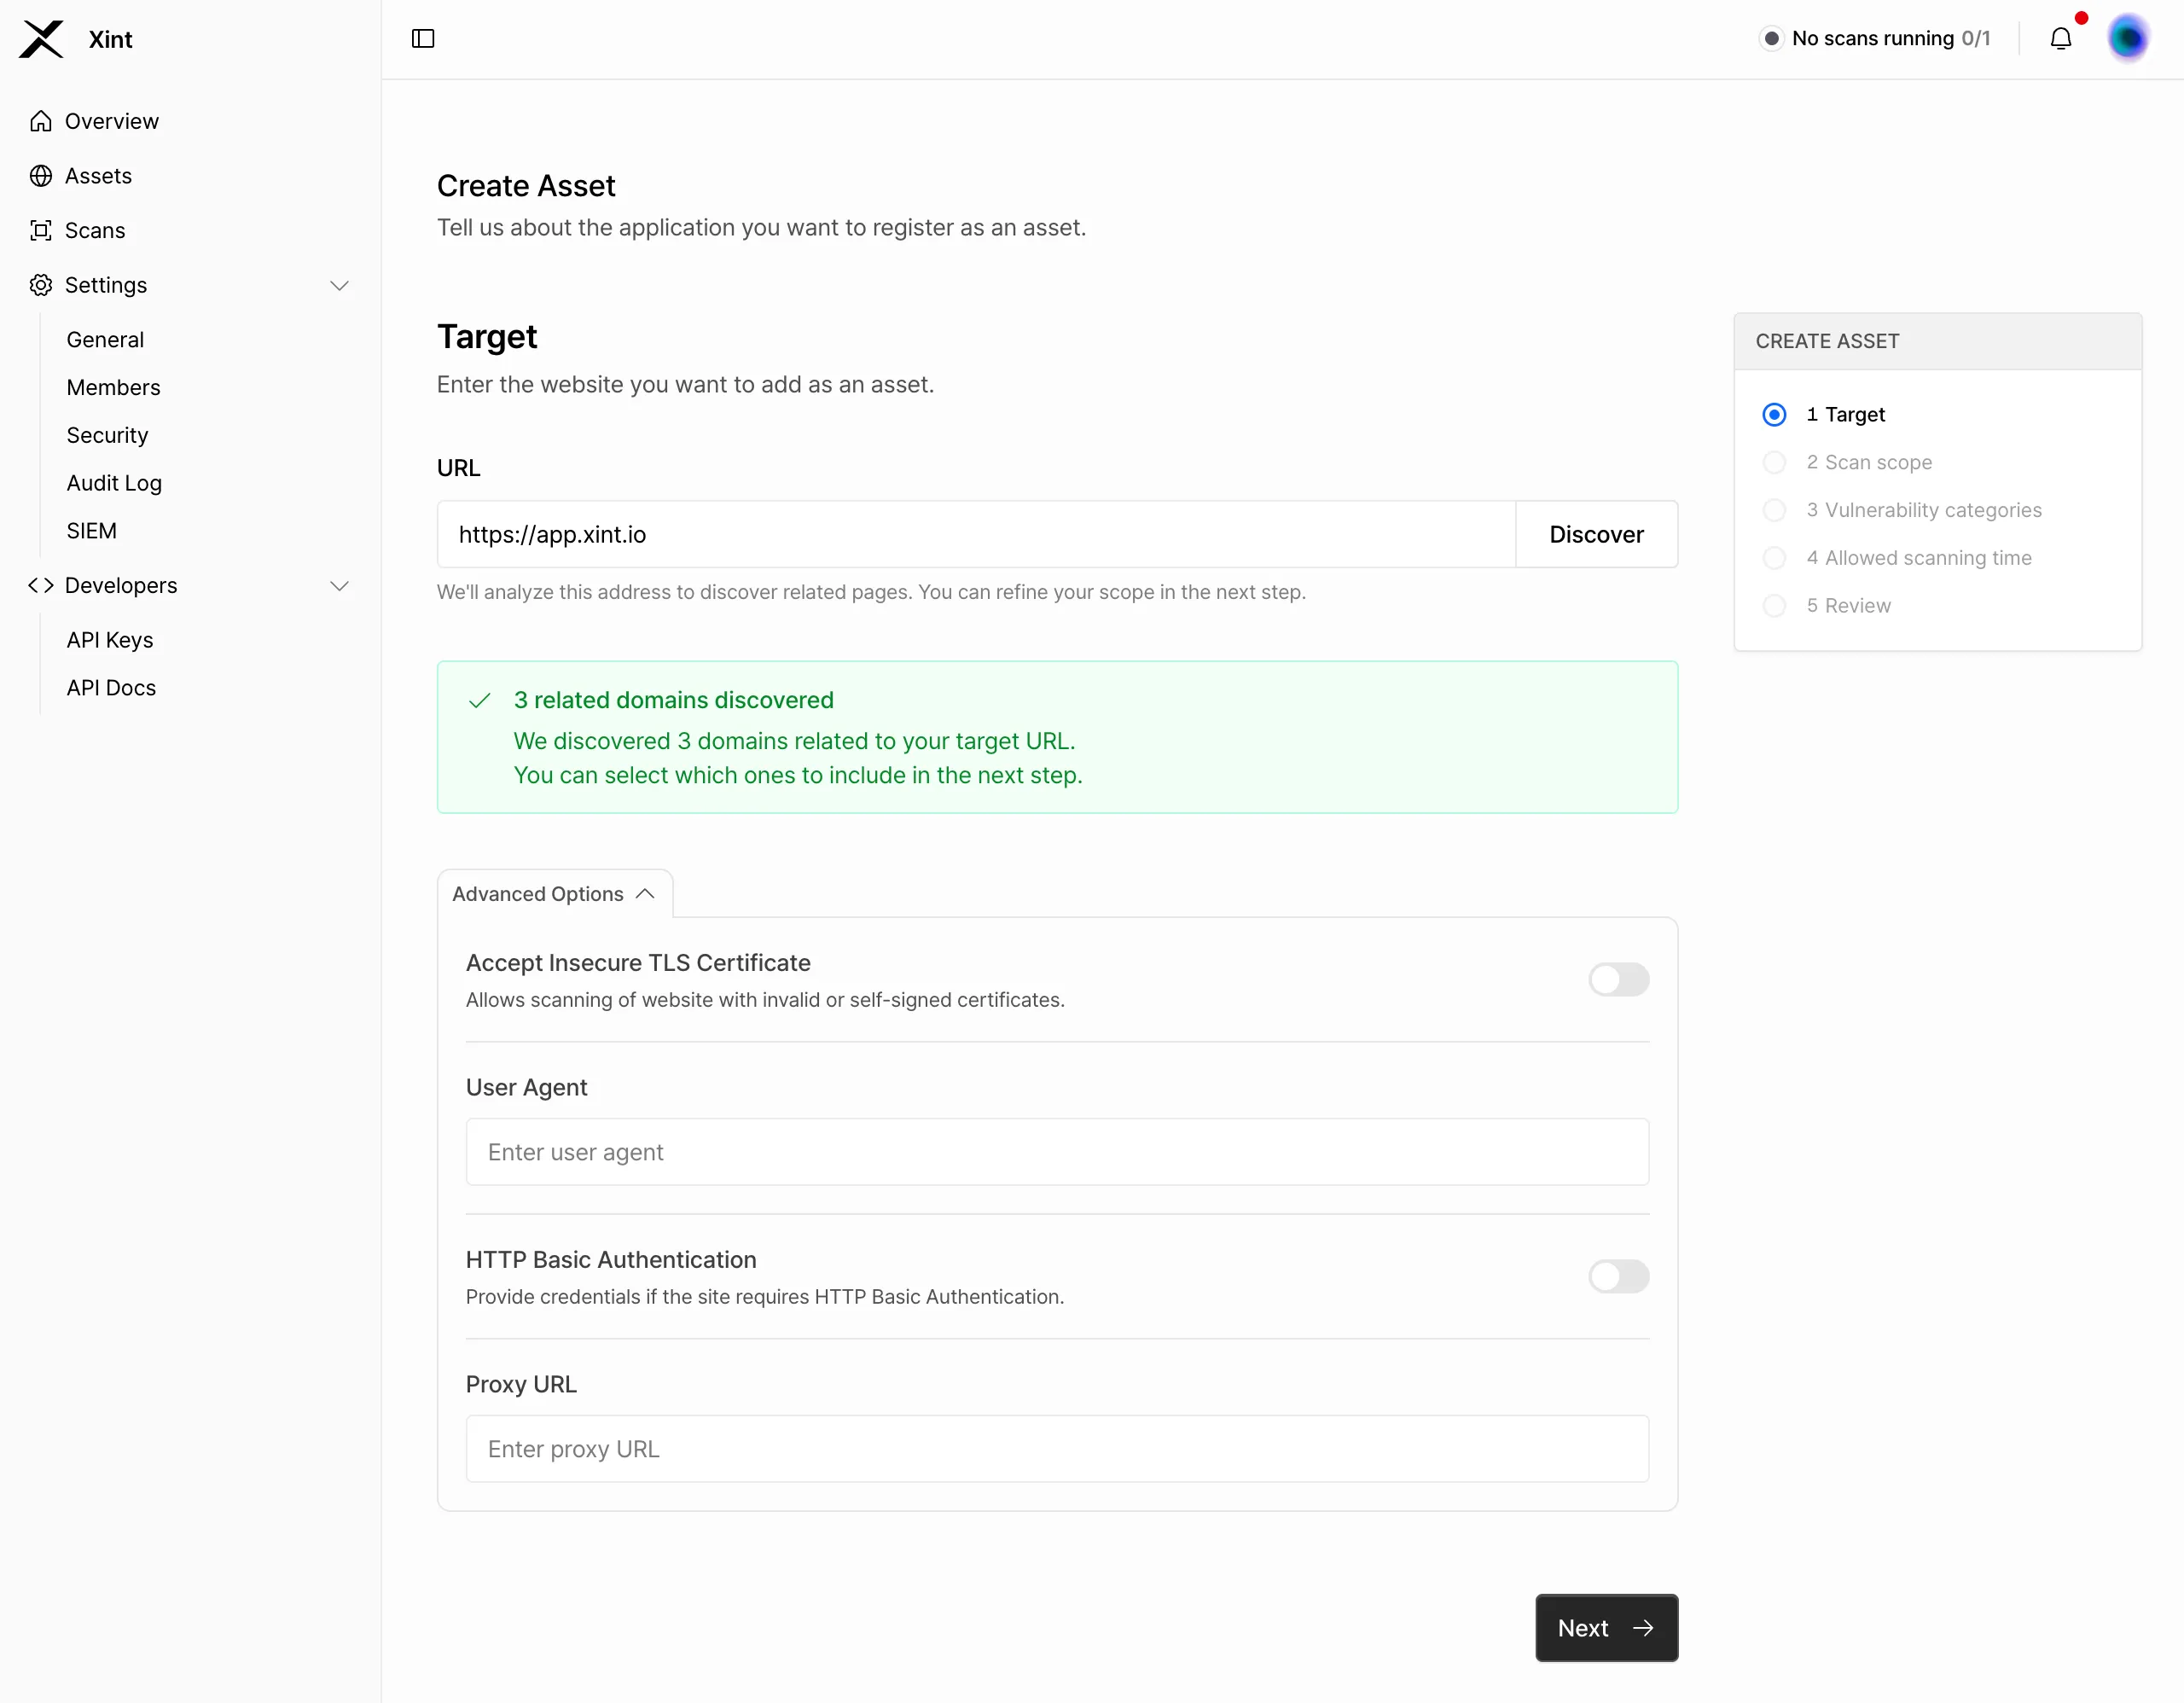
A New Scanning Workflow
Section titled “A New Scanning Workflow”Scans now start with creating an asset. During asset creation, you configure the settings needed to reach your target including the target URL, scan scope, allowed scanning time, and other settings that don’t change often.
Asset settings can be updated at any time, and any changes will apply to scans run after the update.
Once you’ve set up an asset, you can create a scan for it. At the scan level, you specify things that apply only to that particular run such as authentication credentials or an API document upload. You can also override certain asset-level settings on a per-scan basis.
Once a scan is created, it’s queued and executed in order based on slot availability, just like before.
For a detailed breakdown of each configuration option, see the Creating an Asset and Running a Scan docs.
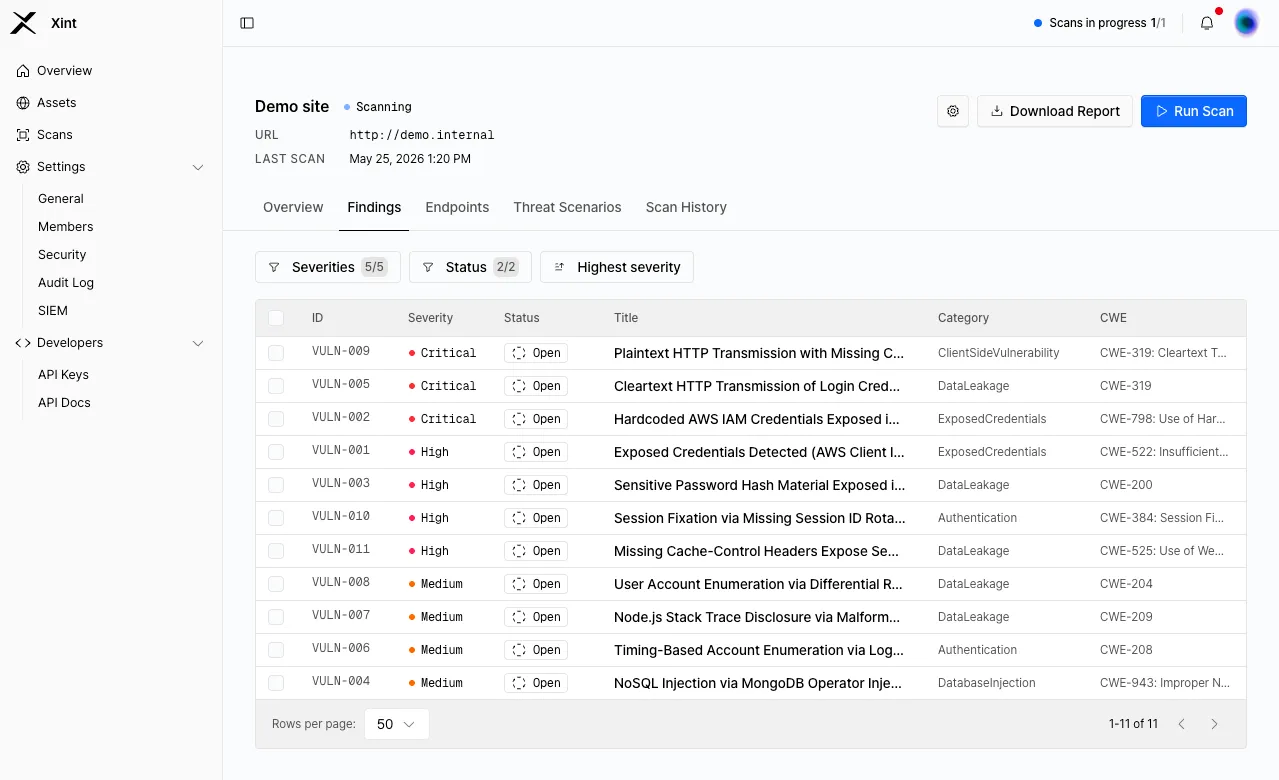
Findings
Section titled “Findings”Completed scan results are still viewable at the individual scan level, but you can now also view cumulative results at the asset level. Within an asset, vulnerabilities discovered across multiple scans are consolidated into Findings — giving you a unified view to track and manage issues over time.
Each finding corresponds to a single vulnerability discovered during a scan. If duplicate findings are created, you can merge them into a single finding to keep things clean.
Retest for Remediation Verification
Section titled “Retest for Remediation Verification”Once a vulnerability has been addressed, you can confirm the fix was effective using the Retest feature. Open the finding detail drawer and click the “Retest” button in the top-right corner to trigger a targeted retest scan.
If the issue is confirmed as resolved, the status will be updated to “Resolved”.

API Document Upload for Scan Creation
Section titled “API Document Upload for Scan Creation”You can now upload an OpenAPI document for the service you’re scanning. With access to your API’s endpoint structure and parameters upfront, Xint can cover significantly more ground and reach areas that browser crawling alone would typically miss.
To use it, upload your file at the “API Document” step during scan creation. This field is optional — you can leave it blank and proceed with the scan as usual.
Other Updates
Section titled “Other Updates”OpenAPI v2
Section titled “OpenAPI v2”With the introduction of Assets, the scan creation flow and underlying data model have been updated and Xint’s OpenAPI spec has been bumped to v2 accordingly. You can review the updated endpoints and schemas in the API Docs page after logging into the Xint dashboard.
In-App Chat Support
Section titled “In-App Chat Support”A chat widget has been added to the bottom-right corner of the website. If you have any questions or need help while using the product, feel free to reach out directly through the chat.